
Print Quality Matters: How to Achieve Crisp and Vibrant Prints
Posted on
Introduction
When it comes to printing, quality matters. Whether you are printing important documents for work or capturing precious memories in stunning photographs, achieving crisp and vibrant prints can make all the difference. The print quality not only enhances the overall impression of your images and documents but also reflects your attention to detail and professionalism.
In this blog post, we will explore the various factors that contribute to print quality and provide you with essential tips on how to achieve prints that are sharp, vivid, and visually stunning. From selecting the right printer and ink cartridges to adjusting printer settings and using high-quality paper, we will cover everything you need to know to optimize your print output.
Additionally, we will delve into the role of software and graphic design tools. By the end of this post, you will have a comprehensive understanding of how to obtain the best possible prints that truly showcase the beauty and precision of your images and documents.
Get ready to take your printing endeavors to the next level and unlock the secrets to obtaining crisp and vibrant prints that leave a lasting impact. Let's dive in and explore the fascinating world of print quality and how you can achieve outstanding results.

Choosing the Right Printer and Ink Cartridges
A. Understanding the role of printer resolution and DPI (dots per inch) Printer resolution and DPI significantly impact the clarity and detail of your prints.
In general, a higher DPI will result in better print quality with sharper details and smoother gradients but for print quality can vary depending on your specific needs and preferences, a DPI of 2400 or higher is typically considered very good for professional print quality.
Here are some examples of printers known for their high print quality:
(1) Canon PIXMA Pro-100: This printer offers a maximum resolution of 4800 x 2400 DPI, making it capable of producing professional-level prints with excellent detail and color accuracy.

(2) Epson SureColor P800: This printer boasts a maximum resolution of 2880 x 1440 DPI, ensuring superior print quality and sharpness. It is widely used by professional photographers and graphic designers for its exceptional color accuracy and wide color gamut.

(3) HP DesignJet Z9+: This large-format printer has a maximum resolution of 2400 x 1200 DPI, making it ideal for high-quality prints in sizes up to 44 inches wide. It uses HP's Vivid Photo Inks to achieve vibrant colors and sharp details.

(4) Brother HL-L8360CDW: Although primarily a color laser printer, the HL-L8360CDW offers a maximum resolution of up to 2400 x 600 DPI, resulting in sharp and clear text and graphics. It is a reliable choice for professional documents and marketing materials.

These are just a few examples of printers known for their excellent print quality. It's important to consider other factors such as color accuracy, ink system technology, and specialized print modes when selecting a printer. Reading reviews and comparing specifications can help you find the printer that best suits your specific needs and desired print quality.
B. When choosing ink cartridges for your printer, it is important to consider compatibility with your printer model, print quality, and longevity.
The following is a step-by-step guide to help you select the right ink cartridge:
(1) Determine the printer and cartridge model: Determine the specific model of your printer. Ink cartridges are usually designed to be compatible with a specific model of printer; look for a cartridge that is compatible with your printer model. Check cartridge specifications, such as ink formulation, color accuracy, and longevity.
(2) Check for OEM or third-party options: Decide whether to use original ink cartridges (OEM - Original Equipment Manufacturer) or third-party alternatives; OEM cartridges are produced by the printer manufacturer while third-party cartridges are produced by other companies; OEM cartridges are expensive and consume very quickly, which is a waste of money for those who need to print a lot. Therefore, try using third-party cartridges from trusted, quality brands when purchasing ink cartridges, such as E-ZInk cartridges, which use premium cartridges formulated to withstand environmental factors, maintain print quality over time, and produce more pages than OEM cartridges.

Using High-Quality Paper
A. The impact of paper quality on print output
Choosing the right paper for your printer is crucial in achieving high-quality print output. The paper quality can significantly impact the sharpness, color accuracy, and overall appearance of your prints. Inferior-quality papers may result in smudged or blurred prints, while high-quality papers can enhance the clarity and vibrancy of your images. It's important to invest in paper that complements the capabilities of your printer and the nature of your prints.
B. Differentiating between various paper types (glossy, matte, professional-grade)
1. Glossy Paper: Glossy paper is known for its smooth, shiny finish that enhances color vibrancy and creates a sharp, detailed look. It is commonly used for photographs and marketing materials where vibrant colors and high contrast are desired. Glossy paper is more reflective, which can make it susceptible to fingerprints and glare.
2. Matte Paper: Matte paper has a non-reflective, flat finish that offers a more subdued look. It reduces glare and provides a softer appearance with a more natural feel. Matte paper is great for text-based prints, artistic prints, and prints that need to be viewed from different angles without interference from reflections.
3. Professional-Grade Paper: Professional-grade papers are typically higher in quality and specially designed for specific printing needs. These papers may offer specific features like archival quality, wider color gamut, or texture that replicates traditional art papers. They are often used by professional photographers, artists, and designers who require the utmost precision and longevity in their prints.
C. Recommending specific paper options to achieve crisp and vibrant prints:
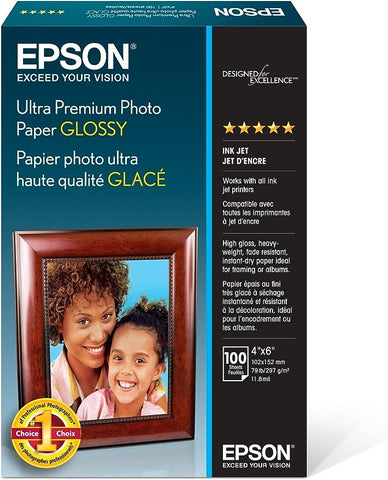
1. Epson Premium Glossy Photo Paper: This glossy paper is designed for use with inkjet printers and provides excellent color reproduction, sharpness, and vibrancy. It is ideal for printing photos and vibrant graphics.
2. Canon Photo Paper Pro Platinum: This professional-grade glossy paper is known for its exceptional color accuracy, sharpness, and archival quality. It offers a wide color gamut and is suitable for high-resolution photo prints.

3. HP Premium Plus Photo Paper: Available in glossy or matte finish, this paper is designed to work seamlessly with HP printers. It produces rich colors, sharp details, and is resistant to water and smudges. It is particularly well-suited for photo prints.

4. FinestraArt Premium Luster Inkjet Photo Paper: This semi-gloss paper strikes a balance between glossy and matte finishes. It produces prints with enhanced color vibrancy, a wide color gamut, and a velvety texture. It is often used for fine art prints and professional photography.

Remember to choose a paper type that complements your specific printing needs, whether it's glossy, matte, or professional-grade. Consider the compatibility with your printer, desired print quality, and the purpose of your prints. Experimenting with different paper options can help you find the ideal combination of printer, ink, and paper to achieve crisp and vibrant prints.
Maintenance and cleaning of printers
A. Regular printer maintenance extends the life of the printer and ensures superior print quality
Proper maintenance of the printer is essential to ensure the longevity of the printer and consistently superior print quality. The following are some regular maintenance routines to follow.

1. Keep the printer clean: Dust and debris can accumulate inside the printer, affecting its performance and print quality. Regular cleaning of the exterior and interior of the printer is required, including the feed rollers and print head.
2. Update firmware and drivers: Manufacturers frequently release firmware and driver updates to improve printer performance and resolve any known issues. Keep your printer's firmware and drivers up to date to ensure optimal functionality and compatibility with new software.
3. Avoid power surges and voltage fluctuations: Protect the printer from power surges and voltage fluctuations by connecting it to a surge protector or uninterruptible power supply (UPS). Sudden power surges can damage the internal components of the printer, resulting in degraded print quality or even total destruction.
B. Clean the print head and cartridges properly to avoid clogging and smudging
Link to previous article: How to Clean Printer Cartridges Properly?
C. Handle and store cartridges to prevent drying or damaged tips
Link to previous article: How to store ink cartridges when not in use?
Using the Right Software and Graphic Design Tools
A. Leveraging software capabilities for enhancing print quality
Color management tools: Color management software ensures that the colors in your designs are accurately reproduced during the printing process.Programs like Adobe Color Management Module (CMM) or X-Rite's i1Profiler can help you calibrate your monitor's colors, create custom printer profiles, and manage color consistency across different devices.
There are step-by-step guide on how to use Adobe's Color Management Module (CMM) to calibrate your monitor's colors:
①Launch an Adobe application like Photoshop or Illustrator.
②Go to the "Edit" menu and choose "Color Settings".
③In the Color Settings dialog box, select the desired working space for RGB, CMYK, and other color modes.This ensures consistency between applications.
④Enable the "Use my settings for this device" option.
⑤Click on the "Advanced" tab.
⑥Under "Color Management Policies", make sure "Preserve Embedded Profiles" is selected for all three categories: RGB, CMYK, and Gray.
⑦Under "Conversion Options", choose the appropriate rendering intent for both RGB and CMYK.
⑧Optionally, adjust other settings like "Engine" and "Intent" based on your specific needs.
⑨Click on the "OK" button to apply the color settings.
B. Utilizing graphic design tools to optimize images and graphics for printing follow these steps:
Open your graphic design software: Launch the graphic design software of your choice, such as Adobe Photoshop or Illustrator.
①Set up your document: Create a new document or open the existing document that contains the images or graphics you want to optimize.
②Check the document resolution: Ensure that your document resolution is set to the appropriate value for printing. For most print projects, a resolution of 300 DPI (dots per inch) is recommended to ensure sharp and clear images.
③Resize your images: Resize your images to the intended print dimensions while maintaining the aspect ratio. Make sure to check the "Resample" option in your software to ensure the image quality is maintained during the resizing process.
④Crop and adjust composition: If necessary, crop your images and adjust the composition to remove any unwanted areas or improve the visual impact. Use the crop and transform tools available in your software to modify and refine the image composition.
⑤Check color mode: Ensure that your document and images are in the correct color mode for printing. For most print projects, the CMYK color mode is used to represent the four primary ink colors (cyan, magenta, yellow, and black). Convert or adjust your document and images to CMYK if needed.
⑥Adjust color settings: Use the color correction and adjustment tools in your software to optimize the colors for print. This may include adjusting brightness, contrast, levels, curves, and saturation to achieve the desired color and tonal range.
⑦Apply sharpening: Apply appropriate sharpening to enhance image details and improve print quality. Use the sharpening tools or filters available in your software to selectively sharpen specific areas if needed.
⑧Embed fonts: If your document contains text, ensure that all the fonts used are embedded in the file. This ensures that the text appears correctly and as intended when printing.
⑨Save your file: Save your optimized images and graphics in a file format suitable for printing, such as TIFF or PDF. Use the recommended print settings from your print service provider or follow industry best practices for file preparation.
⑩Proof and print: Before sending your optimized files for printing, carefully review them to ensure they appear as desired. If possible, print a test copy or use a print preview function to get an idea of how the final printed output will look.
Remember to consult the specific documentation or user guide of your chosen graphic design software for more detailed instructions and to become familiar with any tool-specific options that may optimize your workflow.
Conclusion
In short, getting clear, vibrant print quality is critical for those who value high quality printing. From properly adjusting printer settings and maintaining ink or toner levels, to cleaning the print head and using the proper paper, every step plays a vital role in getting the desired print results. Regularly calibrating, updating printer drivers and performing maintenance checks are also key to obtaining optimal print quality. If all efforts fail, seeking professional help can provide further guidance and expertise. Remember, print quality is crucial, and with the right techniques and attention to detail, you can ensure that your prints come out as vivid and crisp as they should.

If you have any questions, feel free to discuss and give us feedback.
Learn more: How to store ink cartridges when not in use?
Share this post
ENTER YOUR EMAIL
Subscribe to obtain $5 off Coupon!
loading...
WELCOME BACK!
You're already on the list
Take $5
as a thank you for comming
USE CODE: Newez123
